I will be taking maternity leave in 3 weeks and this notebook holds all information for anyone to walk my Artists through finishing the Art Centers to the month of May.
Here's the
TPT for the notebook starter.
I took 2 classes to introduce and demo each grade levels lessons/projects....now it's time for the art making!
First, I had to create 'Custom Tabs'. The tabs were blank, I cut them accordingly and then used color pencils, sharpie, and covered the tabs with tape. Organized!
Here's a FREE Blank Chart.
In the idea of working with centers for 12 weeks, I had to keep track of which classes were where. As you know, field trips, snow days....art classes are missed. My only worry now is that there's not enough time for them to rotate. Don't worry, I have a plan B. During the month of May, Artists will be allowed to make 'mini' works of art at the centers. This will cut a 2 day project into 1.
Back to the Art Sub Center Notebook:
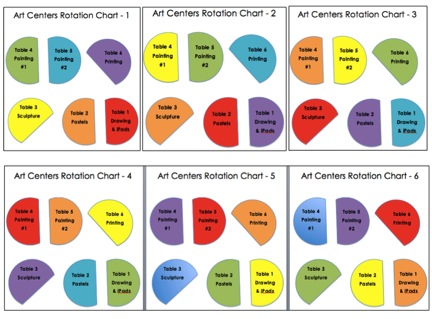
First, I have the daily chart to record which rotation a class is on. Keep in mind, classes on the same day may have different rotations. I have rotation charts located in 3 key places: First, a flip chart outside my door, so Artists can see where their colored table folder is being rotated to before they enter the room.. Second, on the white board...Third in this Sub notebook. Most students understand that they are rotating in order based on the number in which they started at.
I have 6 tables, 6 lessons in 6 mediums... for each class. Each grade level has a box on a shelf located next to the table with the materials they need. I will share a different post on how the shelves and table notebook examples are set up.
Side Note: Artists will make a colored dot mark on the back of their artwork, so when I pull artwork off the drying rack...I can go to their classes bin and know exactly which colored table folder it goes into. My drying rack is also colored coded by grade level.
Next, the Art Center Notebook has a "Welcome, Read Me" and "School Info, Emergency and Management" Tabs. I included a "Daily Morning" to-do sheet of what the Sub should set up and read before classes begin. This should allow the Sub to familiarize themselves with the Art Centers.
The next tabs hold all the lessons for each grade level. Yes, all K - 5 has both a Day 1 and Day 2 schedule lesson plan that does a brief walk through for each table center. (36 different lessons in a day) Yes, it did take a lot of time to put together, but every year, I update lessons and this is a great way to see how lessons/techniques are evolving each year. I'm also considering having the same centers begin in August...they are already set up... and ready to go. At the same time, it's not overwhelming. The lessons are using the same medium/similar at each table. The grade level boxes are already prepped...I had a few more paper here..foam there...to keep materials in stock.

The Day 1 Schedule, is a simple glance at what the Artists at that table are doing for the class period. I have a more detailed Step by Step example in the tables notebook. The Day 2 Schedule, has an overlook of 'the Artists should be finishing up. Have them take a photo to upload to Artsonia. The Upload Station has a posters which walks them through the steps of uploading. Also, they write an Artist Statement and can share their work with others who are finished. Once that's completed, then they may have free time. I'll post my free time activities in a different post.
Last 5 Tabs: After the lesson tabs.....come the Monday - Friday class rosters.
This idea of centers with my students has been trying but very rewarding. My first year with them, I would hang my examples and all the art would look the same. Last year, I rarely put up my teacher examples and I recycled my demo examples...but the kids still wanted theirs too look like mine but 'some' started to personalize their subject matter. This year, it's the total opposite. On my board are all 6 examples for each grade level, but the majority of the work doesn't look like mine. Before starting these centers, I told the students that they had a choice of what he/she wanted to create because "They are the Artist". My leading lesson was just an idea of how the Artist can explore the style of art making. I wanted them to explore a new way to make their art more personal and meaningful with a connection to the lesson idea. I still have some give and take days of asking Artists to work on their craftsmanship and how could they explore different ways in using the materials. Most of all, some of my Artists still need a given Subject/Theme/Direction, but others are beginning to challenge themselves and create what they want to. Overview: It's going to take time.....modified lessons to Tab...not sure yet.